How to Add Live Chat to Any Website in 60 Seconds
Adding live chat to your website used to mean hiring a developer, dealing with complex integrations, and spending thousands on enterprise software. Today, you can embed a fully functional AI-powered chat widget in under a minute — and it works on literally any platform.
This guide walks you through exactly how to do it, step by step.
Why live chat matters in 2026
Studies consistently show that websites with live chat convert 3–5× more visitors than those without it. The reason is simple: when a visitor has a question and nobody answers, they leave and buy from your competitor.
Live chat eliminates that gap. And with AI auto-reply built in, you don't need a support team online 24/7 — the AI handles the routine questions while you focus on the complex ones.
What you'll need
- A free Qply account (takes 30 seconds to create)
- Access to edit your website's HTML — or access to your CMS (WordPress, Shopify, Webflow, etc.)
- Literally 60 seconds of your time
Step-by-step: Adding live chat to your website
Create your free Qply account
Go to app.qply.io/signup. Enter your name, email, and workspace name. 14-day free trial starts instantly.
Copy your embed snippet
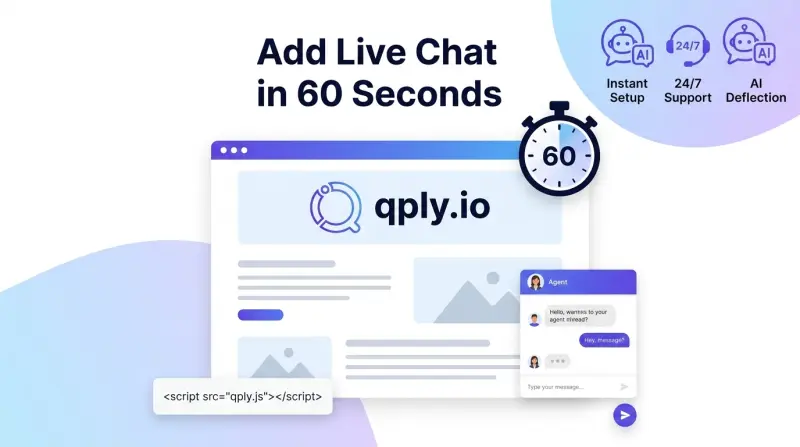
In your dashboard, navigate to Settings → Embed. You'll see a one-line JavaScript snippet unique to your workspace. Click "Copy" to copy it.
Paste the snippet into your website
Paste it just before the closing </body> tag on every page where you want the widget to appear (usually all pages).
<!-- Paste this before </body> -->
<script>
  (function(w,d,s,o){
    w.QplyWidget = o;
    var js = d.createElement(s);
    js.src = 'https://cdn.qply.io/widget.js';
    js.async = true;
    js.dataset.workspaceId = 'YOUR_WORKSPACE_ID';
    d.head.appendChild(js);
  })(window, document, 'script', {});
</script>
Save and publish
Save your file or publish your site. Reload the page — the Qply chat bubble should appear in the bottom-right corner. That's it. You're live.
Pro tip: The widget loads asynchronously — it won't slow down your page or affect your Core Web Vitals score.
Platform-specific instructions
The same snippet works on all platforms, but here's exactly where to put it on the most popular ones:
WordPress
Go to Appearance → Theme Editor → footer.php and paste the snippet before </body>. Alternatively, use a plugin like "Insert Headers and Footers" — paste the snippet in the Footer field.
Shopify
Go to Online Store → Themes → Edit code → theme.liquid. Find </body> near the bottom and paste the snippet just before it. Save.
Webflow
In the Webflow Designer, go to Project Settings → Custom Code → Footer Code. Paste the snippet there and publish.
Squarespace
Go to Settings → Advanced → Code Injection → Footer. Paste the snippet and save.
Wix
In the Wix Editor, go to Settings → Custom Code → Add Custom Code → Body - end. Paste the snippet and apply to all pages.
Customizing your widget
Once installed, you can customize the widget from your Qply dashboard without touching any code:
- Colors: Match your brand with a custom accent color
- Bot name: Give your AI a name (e.g., "Aria from Acme")
- Welcome message: Set a greeting that matches your brand voice
- Office hours: Show an "away" message outside business hours
- Position: Move the bubble to the bottom-left if preferred
Setting up AI auto-reply
The real power of Qply is the AI. After installation, go to Settings → AI to:
- Choose your AI model (Advanced AI Models)
- Write a system prompt that tells the AI about your business
- Upload knowledge base documents — FAQs, product docs, pricing pages
With a well-tuned knowledge base, the AI will accurately answer the majority of incoming questions without any human intervention. Your team only needs to handle the complex or sensitive ones.
Monitoring conversations
All conversations appear in real-time in your Qply dashboard. You can:
- Read every chat as it happens
- Click "Take Over" to jump in and reply as a human agent
- See visitor details — page they're on, country, device
- Tag and filter conversations
- Export conversation data for analysis
Frequently asked questions
Does the widget slow down my website?
No. Qply's widget loads asynchronously after your page's main content is fully rendered. It has zero impact on LCP, INP, or CLS — Google's Core Web Vitals metrics.
Does it work on mobile?
Yes. The widget is fully responsive and optimized for mobile, tablet, and desktop. It automatically adapts to screen size.
Can I remove the "Powered by Qply" branding?
Yes — the branding removal option is available on the Pro plan. On the Starter and Growth plans, a small "Powered by Qply" link appears at the bottom of the widget.
How many chats can I have during the free trial?
All plans include a 14-day free trial with full access. Starter ($12/month) includes 300 AI replies per month, Growth ($19/month) includes 1,000, and Pro ($49/month) includes 5,000 AI replies plus custom branding.
Ready to add live chat to your website?
14-day free trial. Takes 60 seconds to set up.
Start 14-day free trial →Related: AI Chatbot vs Live Chat: Which One Does Your Business Need? · 7 Ways to Reduce Customer Support Costs